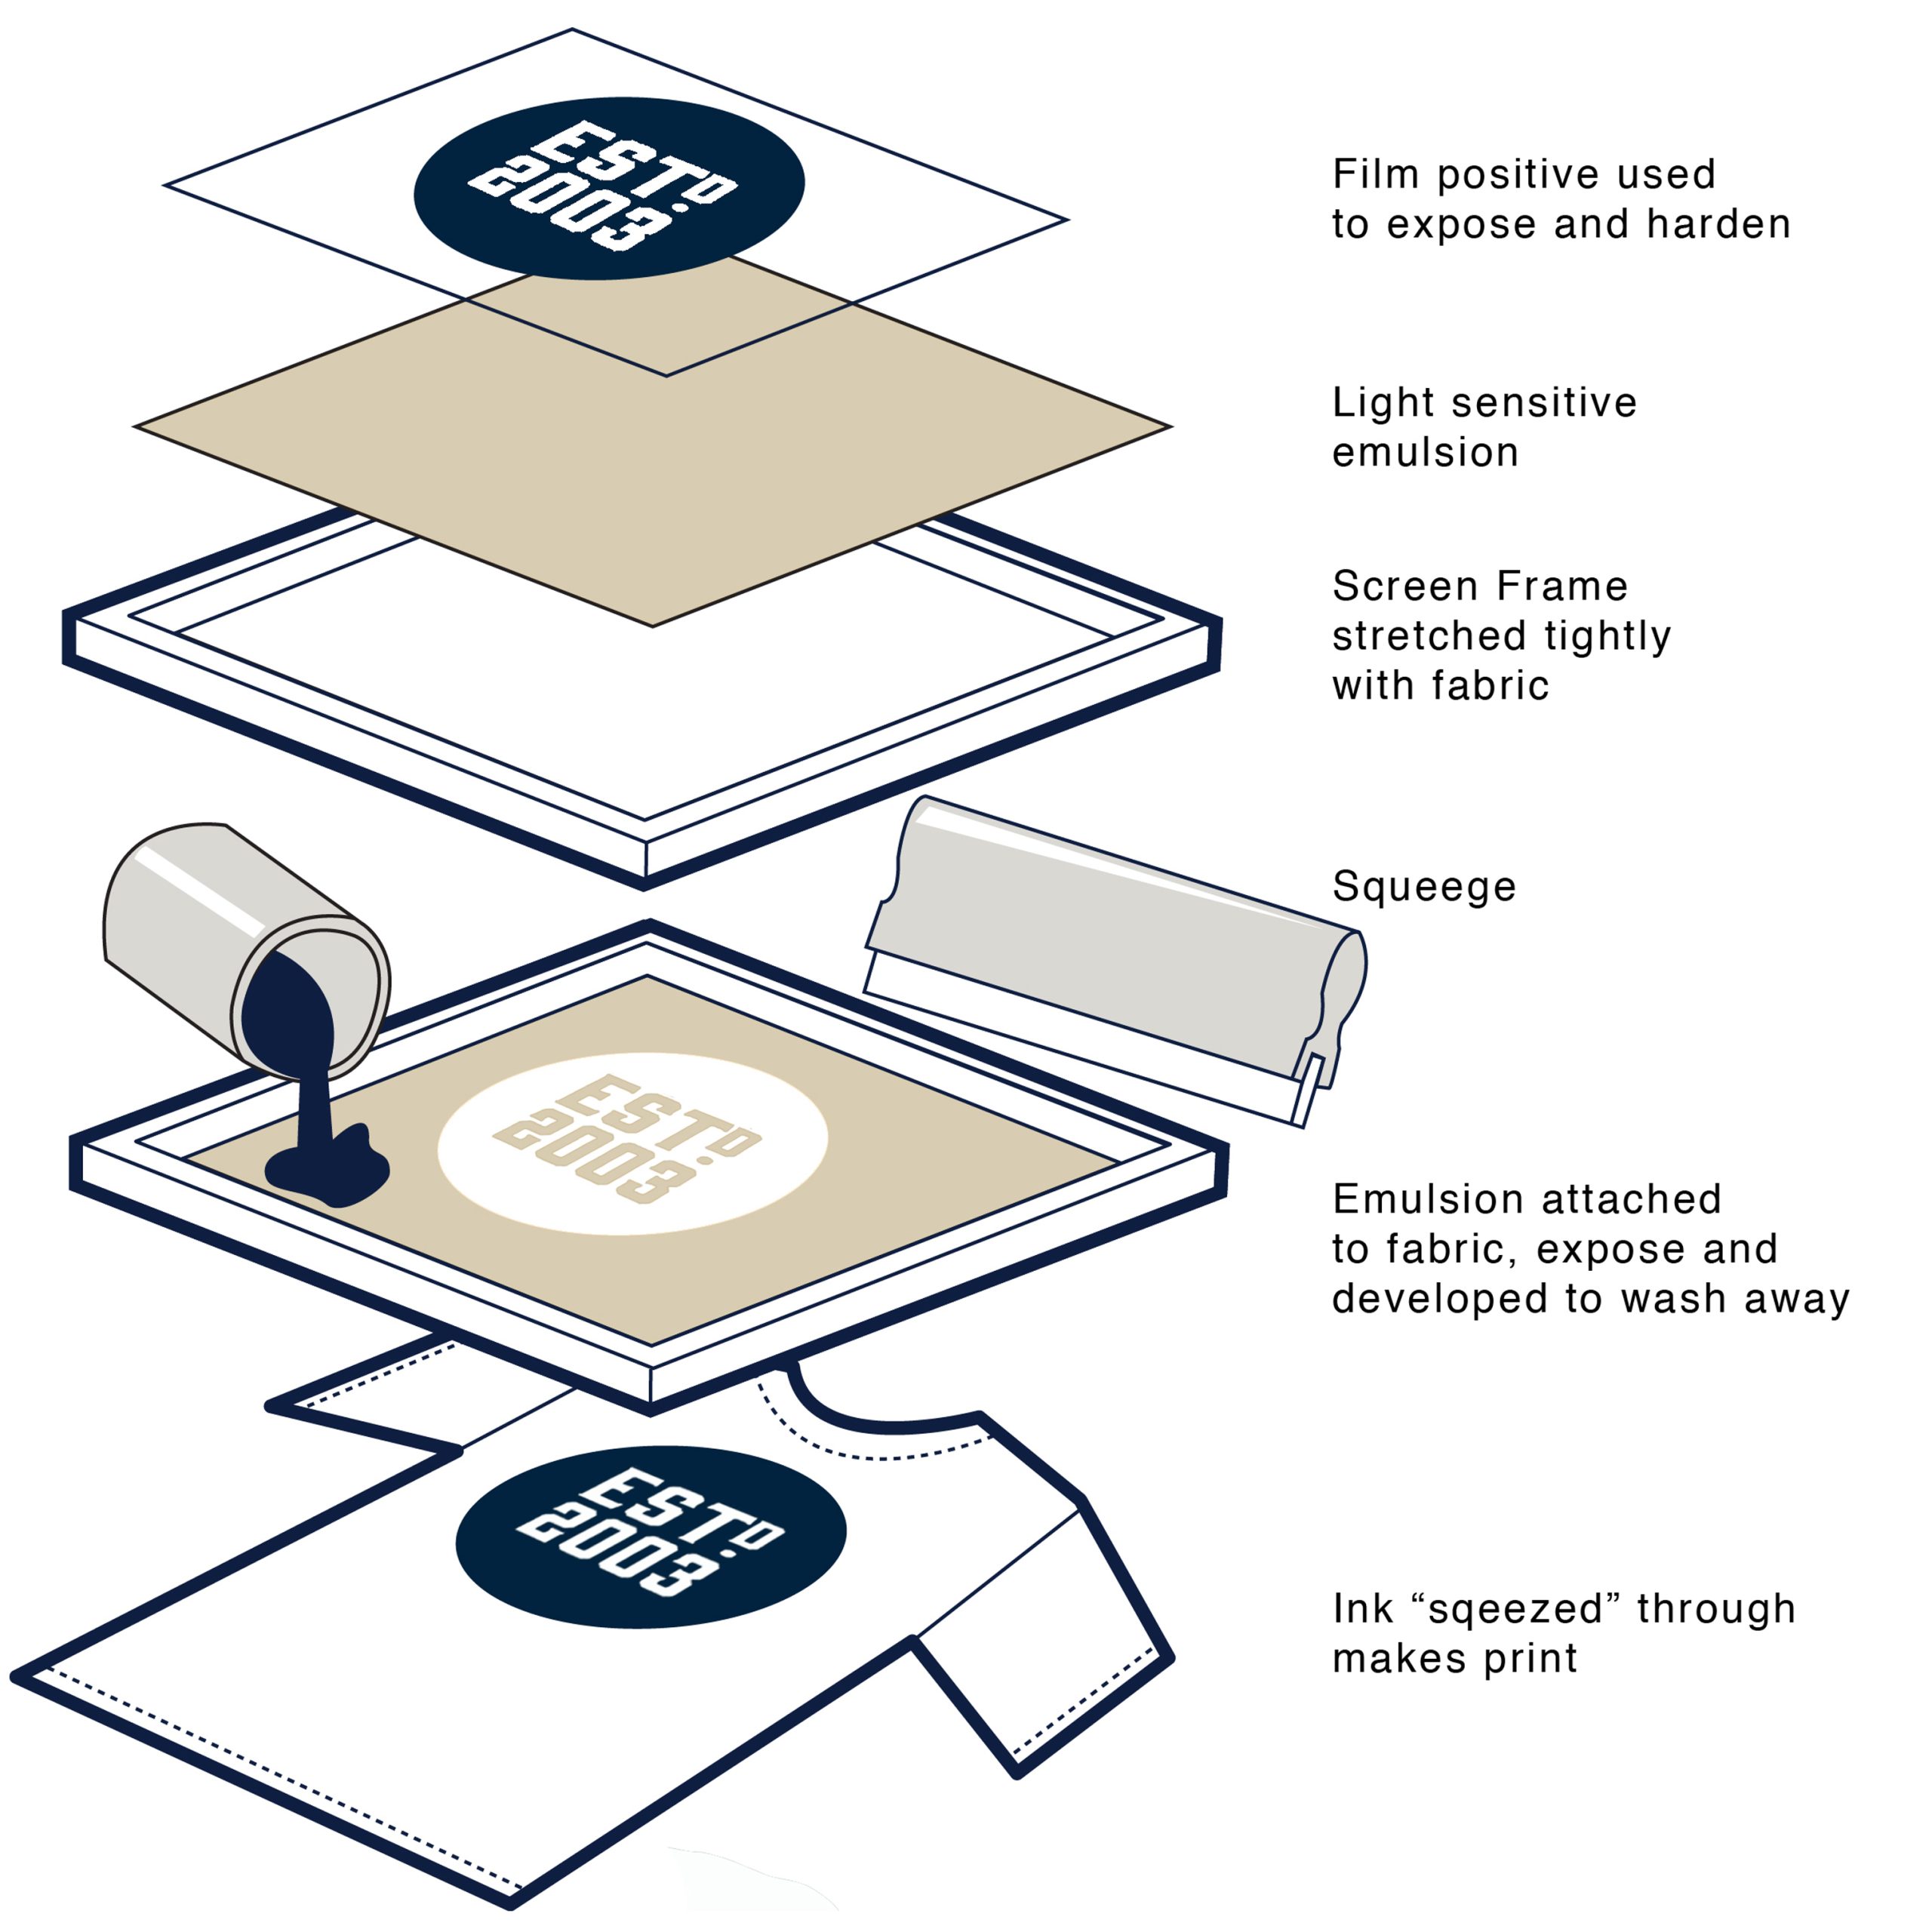
From Concept To Screen Printed T-shirt: A Six Step Process
Unless you have been on a screen printing shop tour or had the opportunity to print t-shirts firsthand, you may not know just how an idea actually becomes a screen printed t-shirt. In fact, even if you have been on a shop tour, without experiencing the process from start to finish with the same design, the steps may be a little unclear. In this blog, we’ll go over each step in detail and wrap it all up with a short video so you can see the process in action.
Step 1: Draw Something
I chose “Draw Something” as the first step because it is the most fundamental. Screen print art departments turn bar napkin sketches into beautiful works of t-shirt art on a regular basis, so a rough drawing is considered absolute ground zero. If you are having your screen printer’s art department create art for you, sketches of your ideas, logo placement, and text layout are all very helpful. You don’t have to use a bar napkin—any paper you have on-hand will do.
Step 2: Scan And Add Finishing Touches
By scanning a drawing, you can clean up the lines, add color, add text, complete the design, or make any adjustments to perfect the art file. Most shops these days process art digitally, so this is a necessary step even if no additions or tweaks are needed. If you submit art that is already complete and fully digital, skip this step.
Step 3: Print Film Positives
Your final digital art file is color separated to make film positives. Color separation is when you tell the design software which color areas in a design will become a screen. The software communicates this information to an office printer that will print black ink or toner on a clear plastic surface such as vellum, acetate or clear film. One film positive is printed for each color that is going to be screen printed.
Step 4: Make The Screens
Metal frames are covered with an acrylic mesh fabric that is stretched tight. These mesh covered frames are the screens used in screen printing. Blank screens are coated with a light sensitive emulsion. Once dry, the film positive is affixed to the screen with some clear tape. The frames are then placed on a large vacuum table, called an exposure unit, and exposed to intense light for a short period of time that varies depending on the amount of detail in the art and the tightness of the fabric weave. The black ink or toner on the film positive blocks the light from shinning on the emulsion in those areas. Once the calculated exposure is complete, each frame is rinsed off with water and the emulsion in the areas that were blocked from light dissolve. These areas remain open and screen printing ink will be able to pass through the open mesh.
Step 5: Set Up The Press
A press operator prints one color on a scrap shirt and aligns the other screens. The alignment of the screens is called registration. Once the screens are registered, the press operator adds the appropriate screen printing ink to its corresponding frame and runs a sample by printing all of the colors. Any nudges to the registration can be done at this time until all colors line up perfectly.
Step 6: Run The Press
Each shirt is loaded on screen printing pallet (also called a table) and makes its way around the press stopping at each head (or station). At each head a different ink color is printed by a squeegee that pulls the ink across the stencil made on the frame. Once all of the colors have been printed, the shirt is removed from the pallet and placed on a conveyor belt. The belt travels through a dryer where it is exposed to the extremely high temperatures needed to cure (or set) the ink. Upon exiting the dryer, the t-shirts continue on the belt where they are caught and counted by a QC (quality control) specialist.


